While working from home has been a normal for me for some time, the 2020 COVID-19 social distancing mandate has added another element to making my home office even more functional. This time around, I wanted to finally get a rig set up so that I could effectively use all four of the LCD monitors in my possession.
So, in the spirit of DIY and building things out of my favorite material – 3/4 in plywood – I set out to design a quad monitor stand that could sit atop my desk and fit under the shelving above.
The Before Shot
Here’s how I was previously set up with only 2 monitors on a simple riser. Insert blanket “Please excuse the mess” comment here.
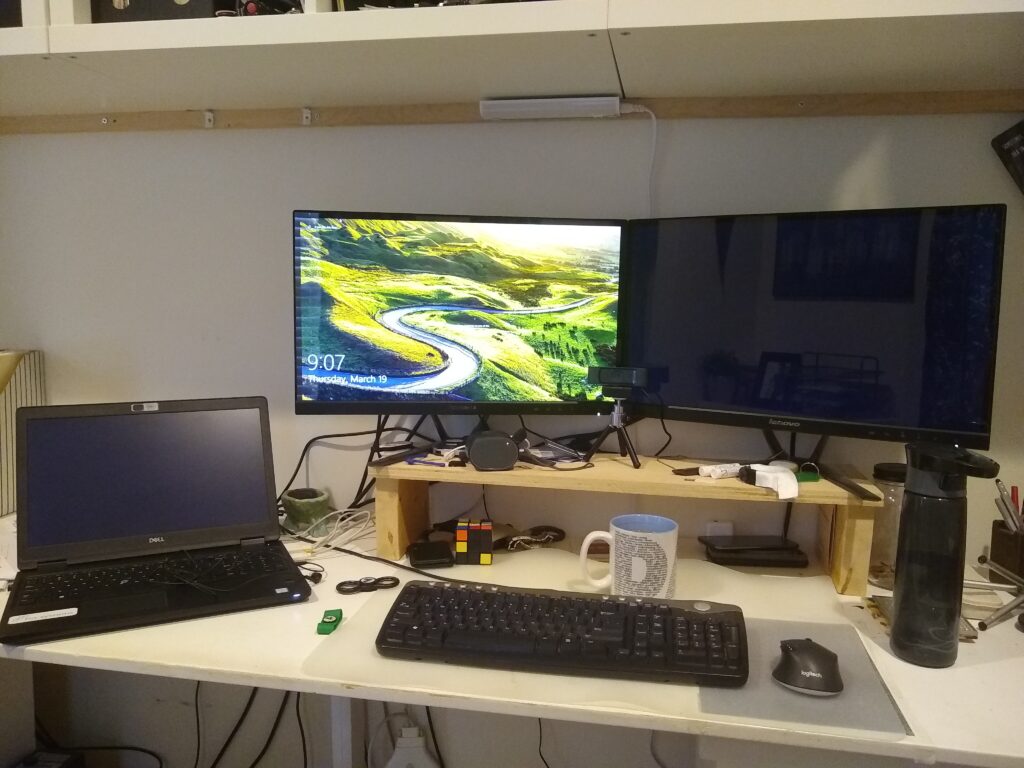
The total spacing between the desktop and the shelves about is about 29 inches.
Planning out the build
I looked at a lot of pre-fabricated and other DIY designs. Prices for 4-monitor stands online ranged from $50 to $100. There were a few 2 and 3 monitor designs I found that used black pipe. In the end, I went for a lattice type design rather than having a single central vertical component with horizontal ‘wings’. I suppose if I was using metal components that would work, but with wood I was worried the weight would be too much to support.
I began by laying out the monitors on the floor and taking measurements.
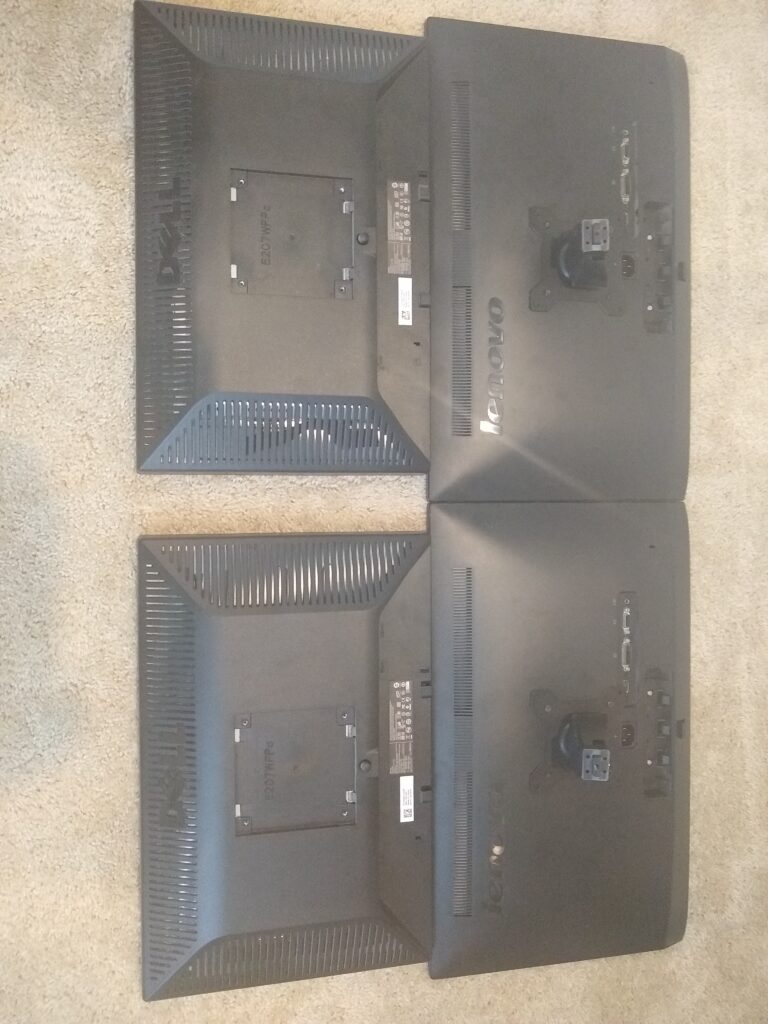
Since each pair of monitors was a different size, I aligned them on the mounting brackets. I was okay with the gap in the middle since I planned to have my webcam sit in that space.
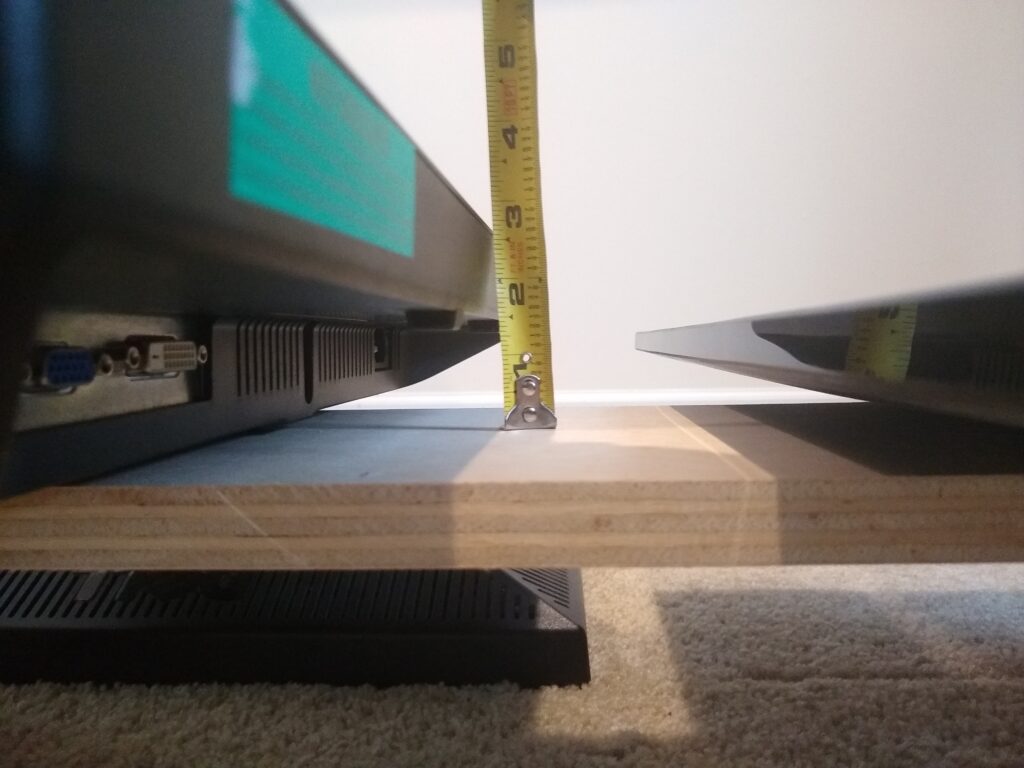
One thing I also had to consider (though in the end I did not make any adjustments) was that each set of monitors was a different thickness. The older monitors were a full inch thicker than the newer ones.
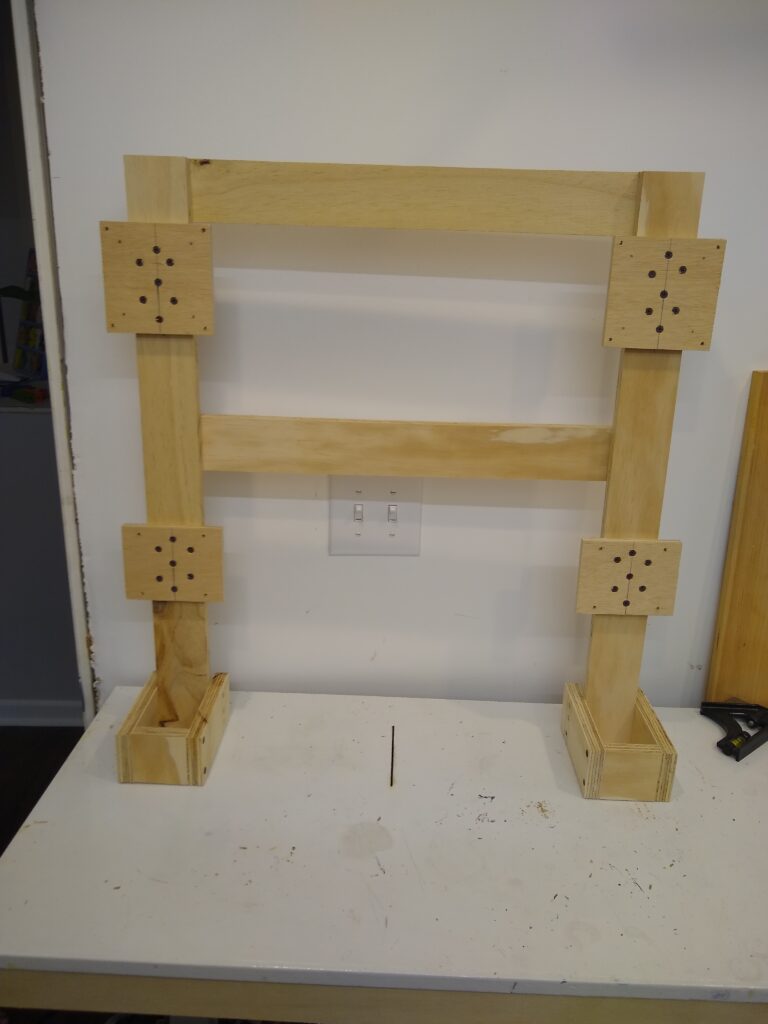
The Design
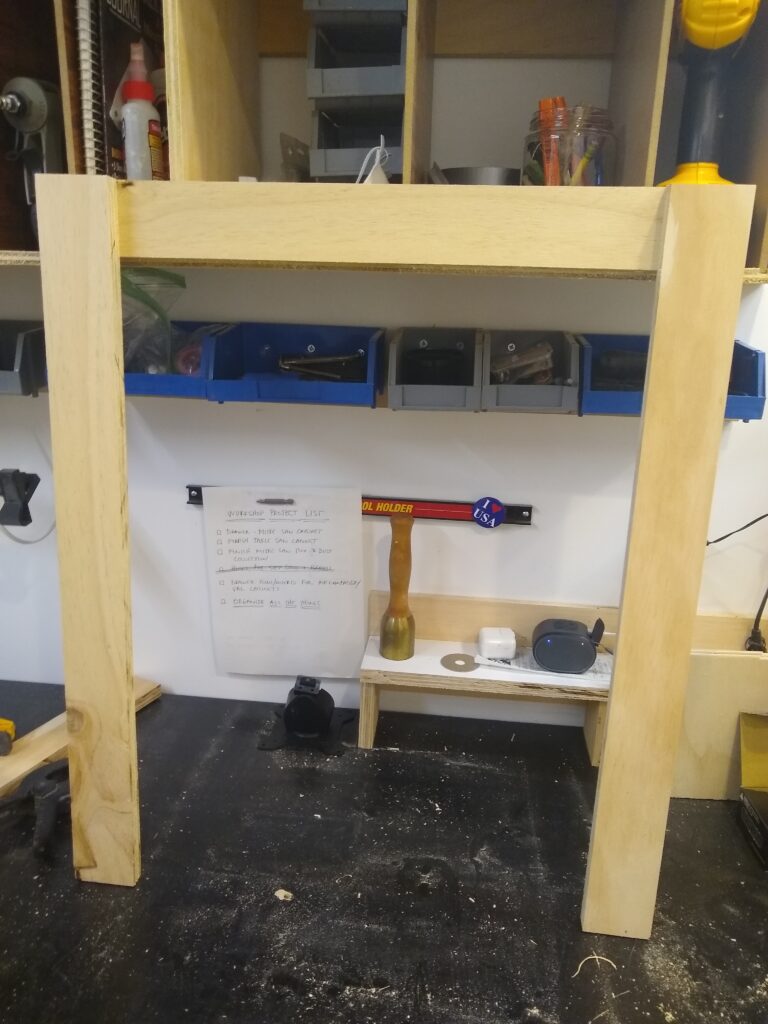
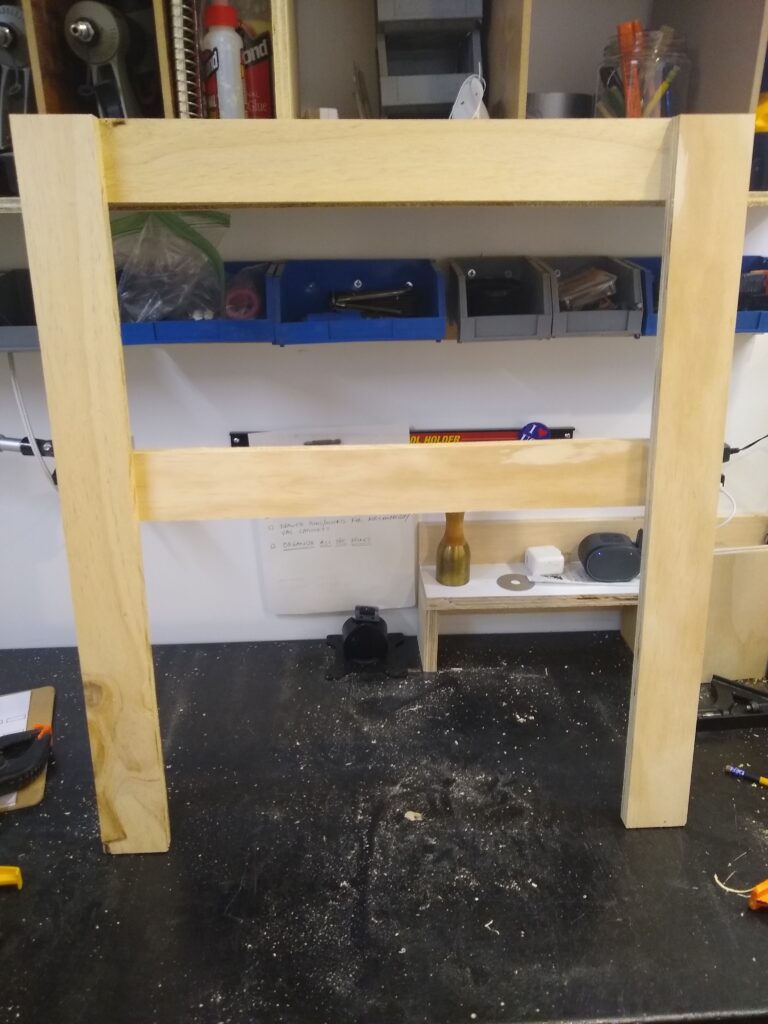
I decided to use 2 vertical supports aligned on the monitor mounting locations, connected with 2 horizontal pieces for rigidity. I would then simply add small feet to the base on each side to help the rig stand freely and not tip forward.
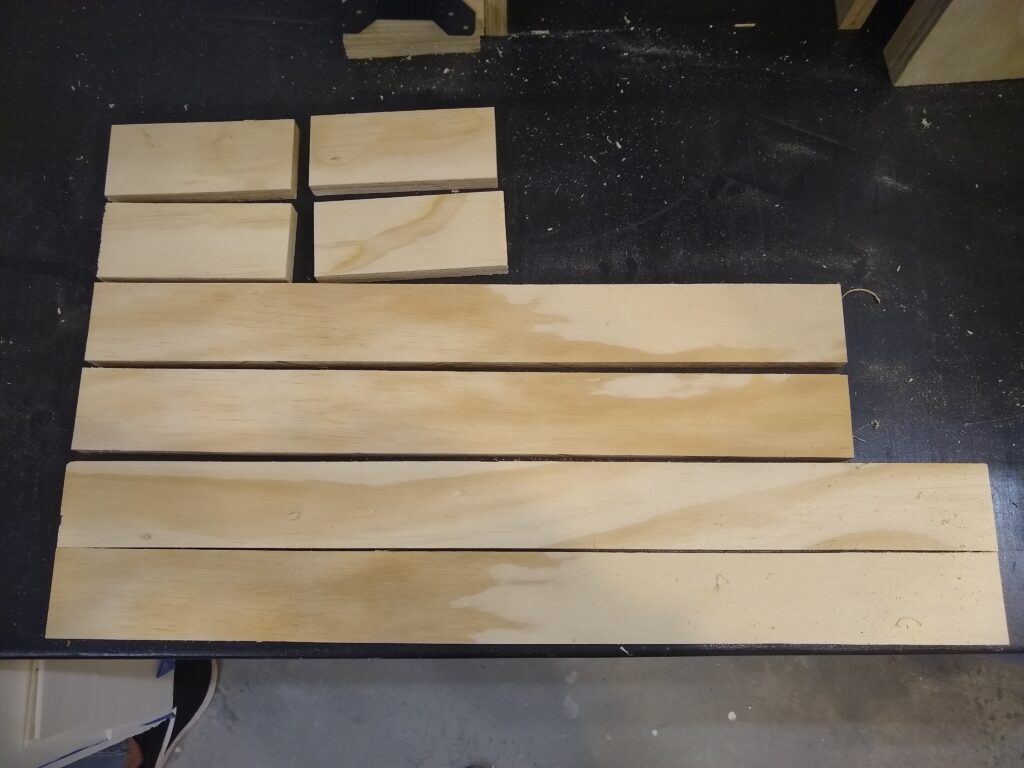
Here’s the cutlist I ended up with:
| Dimension | Quantity | |
| Vertical Support | 3/4″ x 2 1/2″ x 27″ | 2 |
| Horizonal Support | 3/4″ x 2 1/2″ x 23 1/2″ | 2 |
| Feet | 3/4″ x 2 1/2″ x 6″ | 4 |
| Feet Spacers | 3/4″ x 2 1/2″ x 2 1/2″ | 2 |
| Small mounting plate | 1/2″ x 4 1/2″ x 3 1/2″ | 2 |
| Large mounting plate | 1/2″ x 4 1/2″ x 4 1/2″ | 2 |
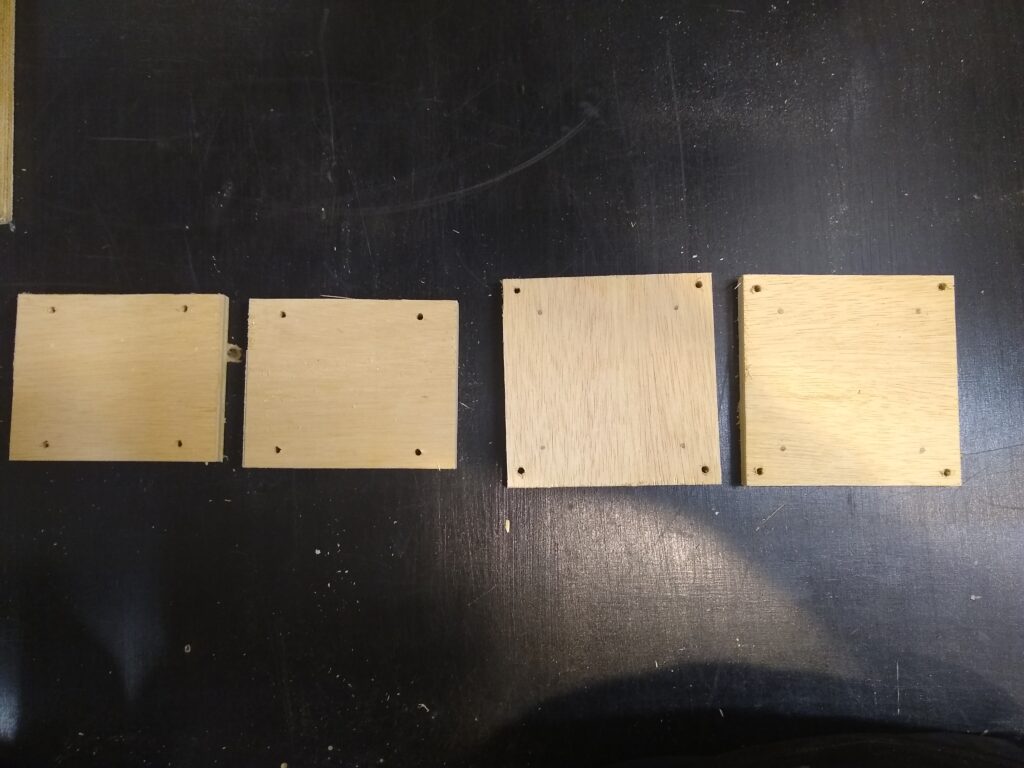
I made the monitor mounting blocks using 1/2″ plywood. I had a fabricated VESA mounting plate that I could use to transfer the screw placement on to these blocks.
Using a table saw to rip down the plywood, a miter saw to cut length, and a drill to create the screw holes, I had all my components ready.
Assembly
Assembly was pretty straightforward, though I did a lot of dry fitting to check alignment with the actual monitors to make sure that everything lined up as expected. I also had to ensure the vertical placement of the mounting plates was correct so the monitors were not too high to fit under the shelves above my desk.
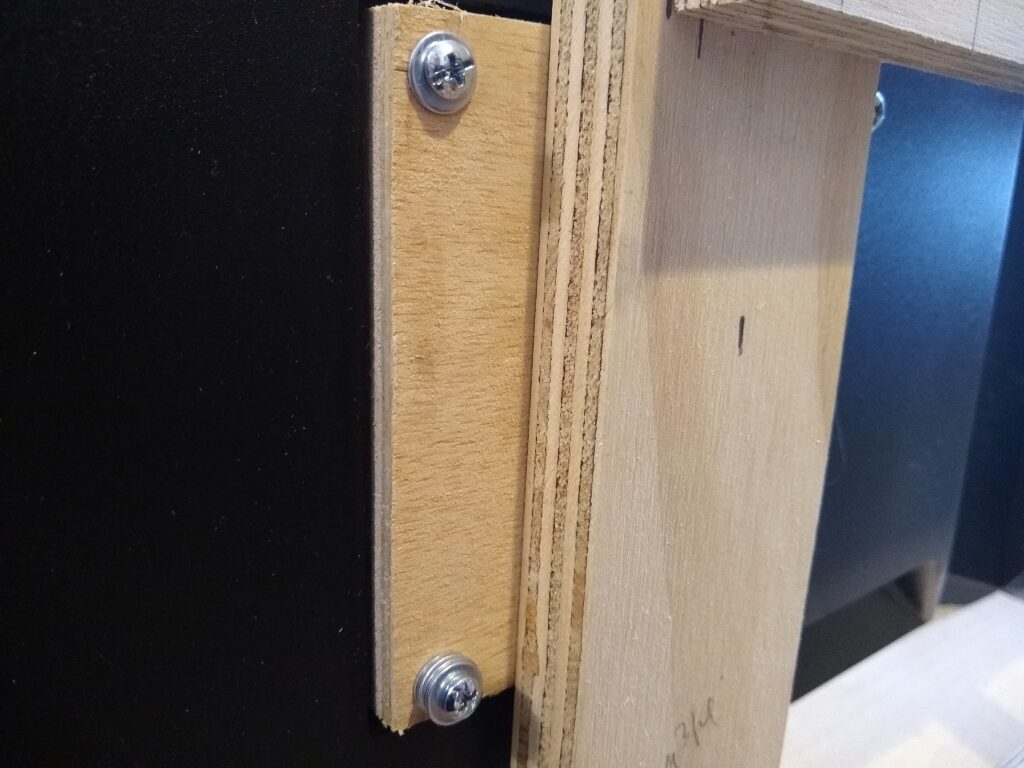
I used 1″ drywall screws to attach all pieces together. I chose not to use glue but it wouldn’t hurt to ensure the security of all the joints.

To ensure the placement, I did another dry fit against the monitors to ensure the spacing and vertical placement was correct. In my case the lower plates are 7 3/8″ up from the bottom, and the uppers are 19 3/4″ up.
Hardware
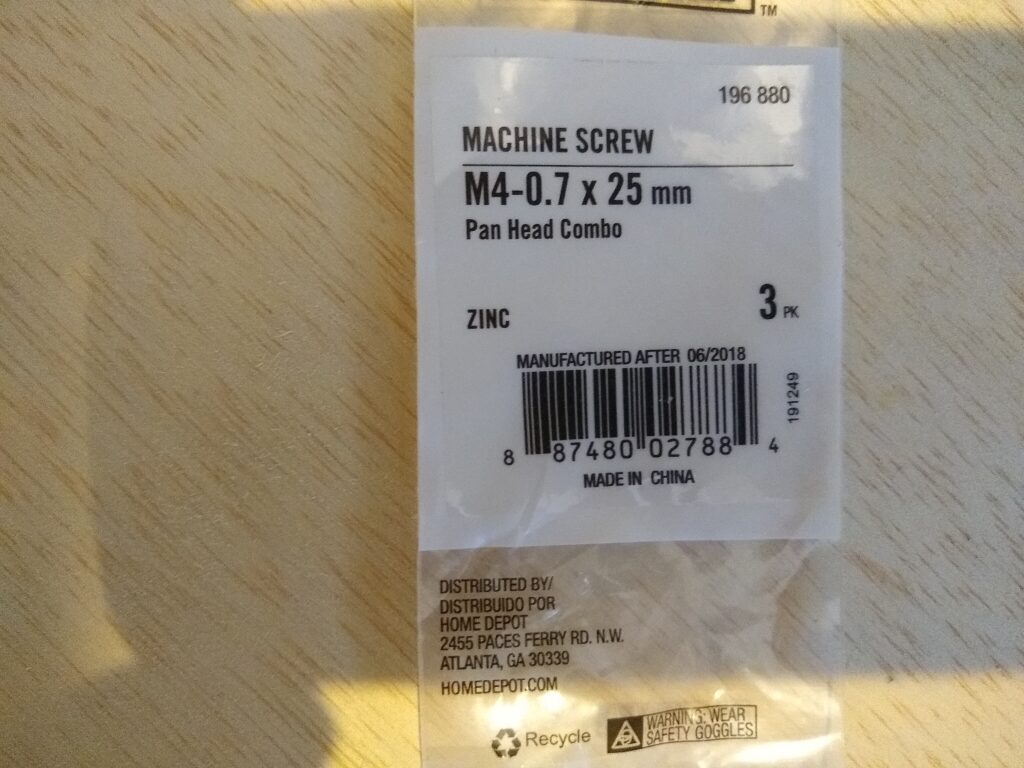
I’m guessing it’s a universal standard, but the mounting screws used are metric with the following spec: M4-0.7.
At Home Depot I found both 25mm (about 1″) and 30mm (about 1 1/4″) length screws. These are not on the big racks of packets in the hardware aisle, but rather in the drawers with more specialized hardware.
I also used small washers – and in the case of the 30mm screws, I used 5 washers to create a spacer.
Mounting the monitors was the moment of truth. Would the plates and screw holes all line up. Wow – got it on the first try!
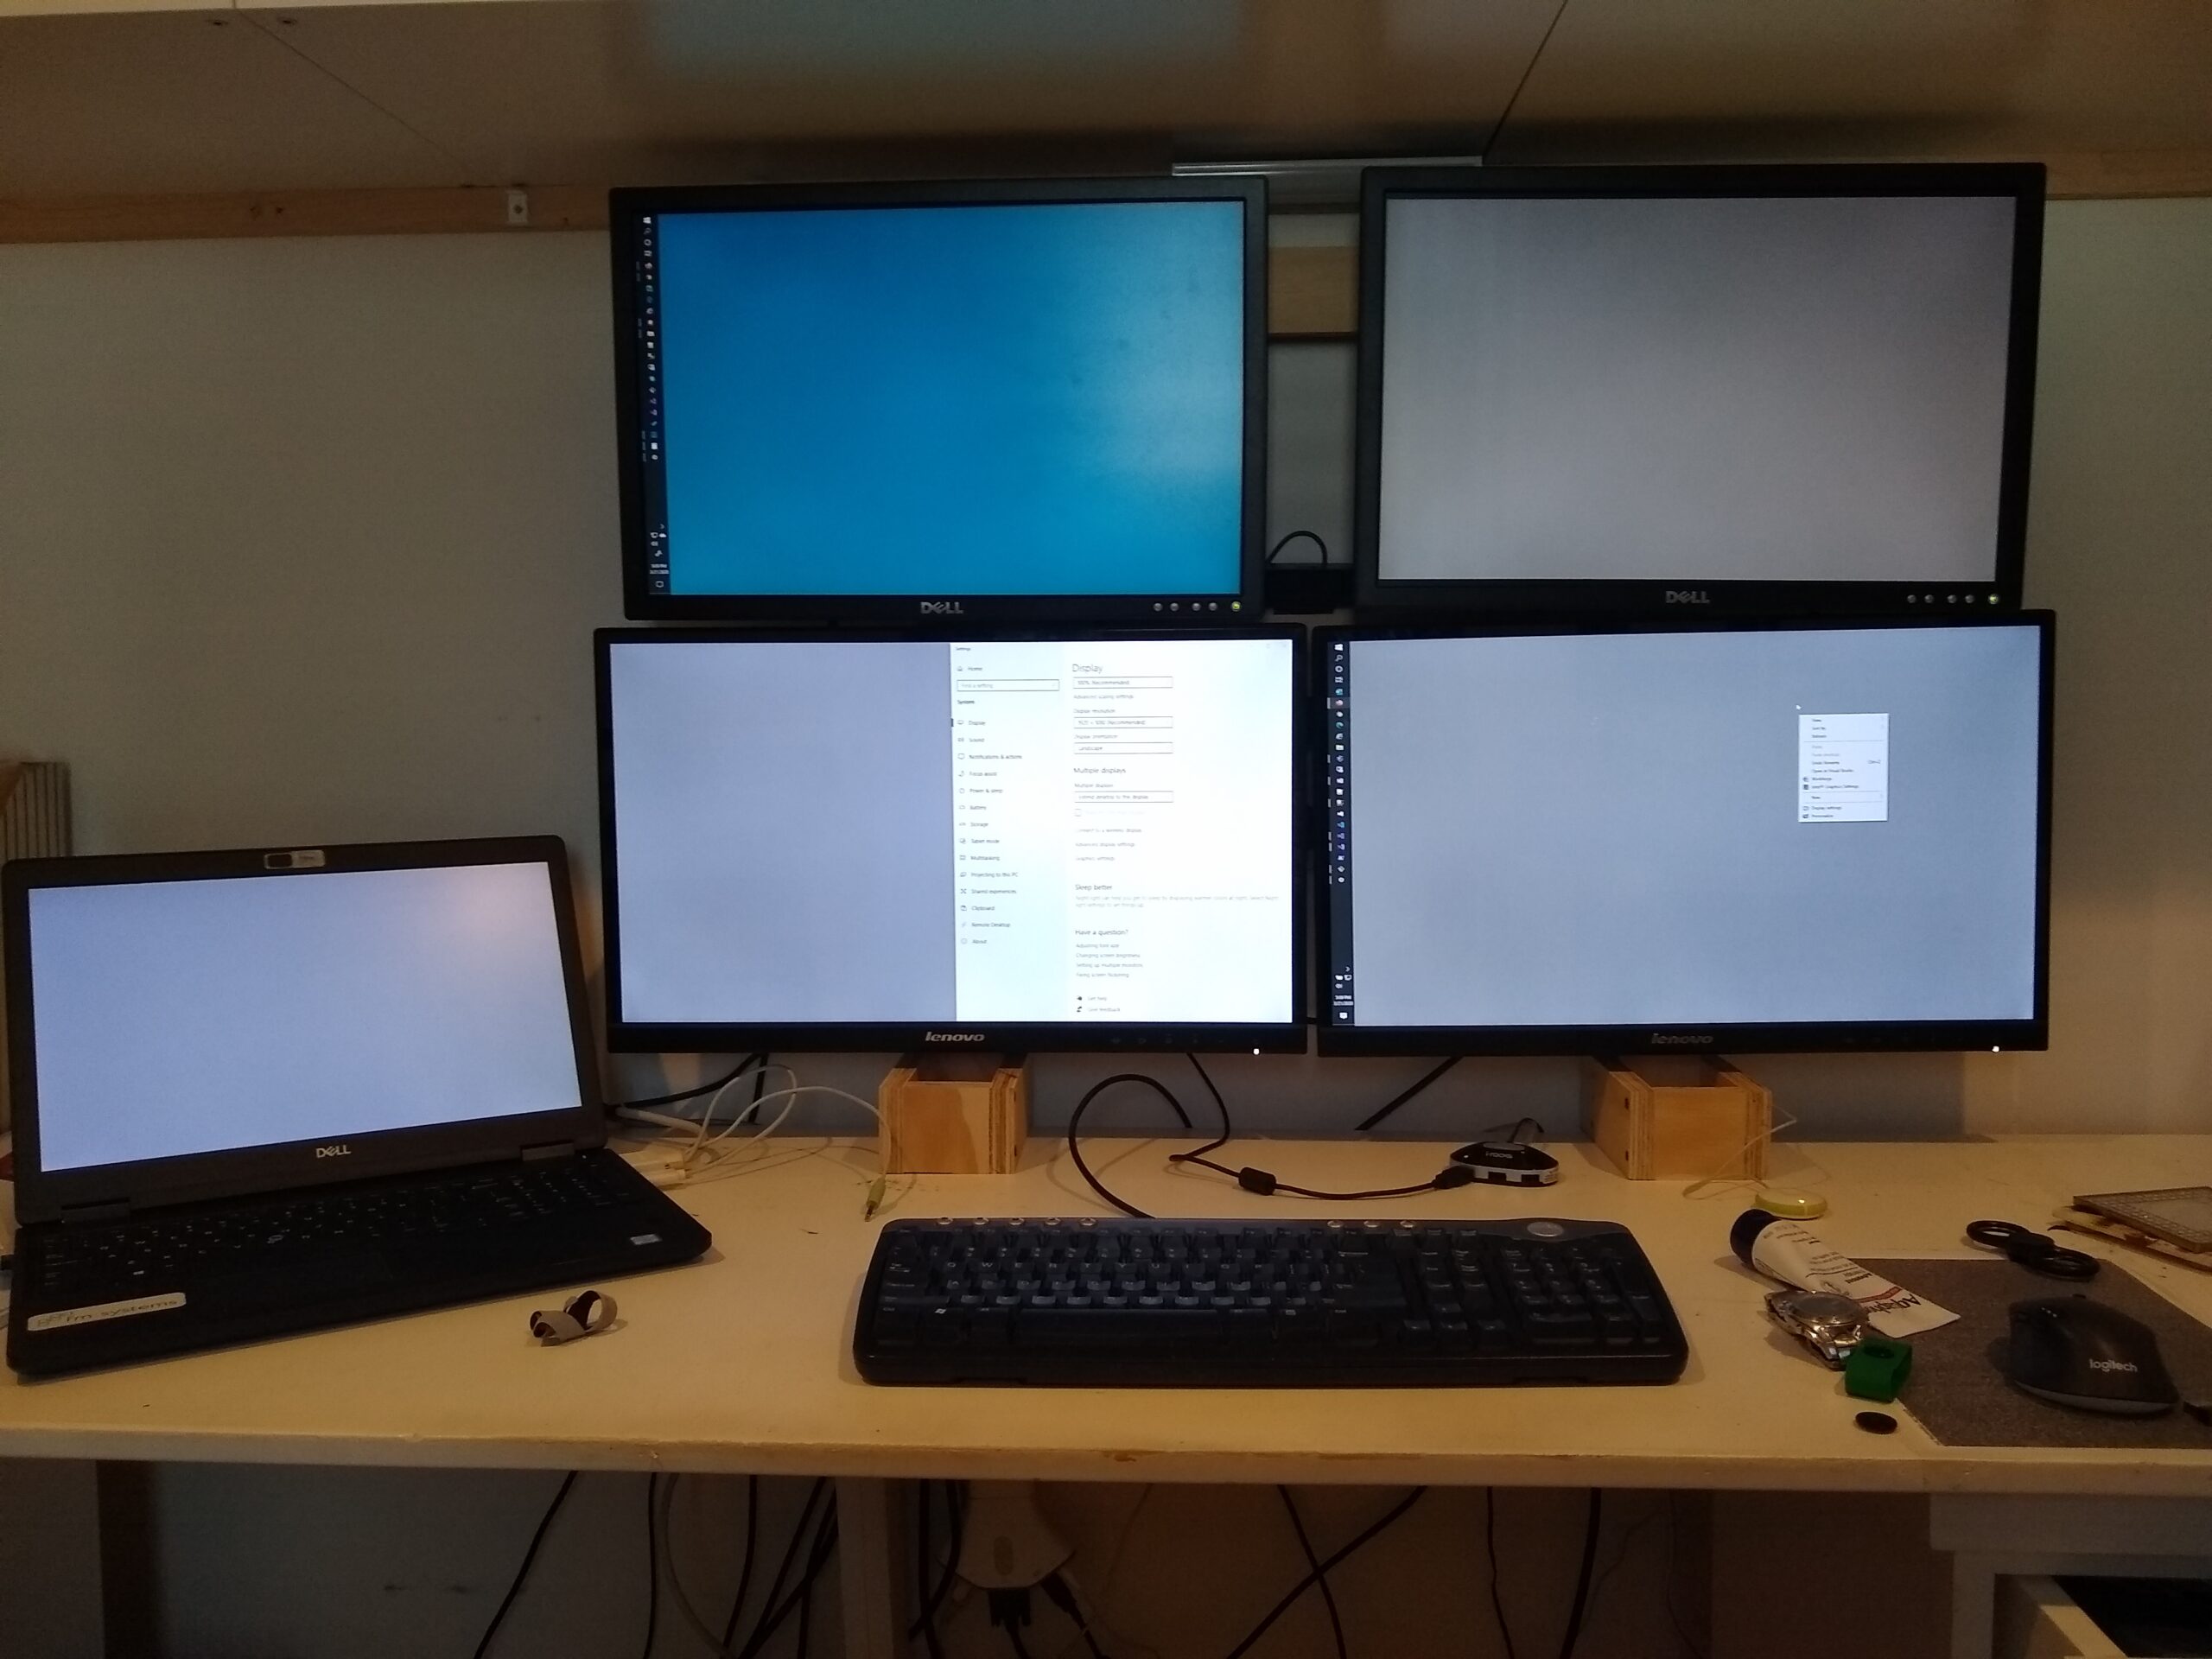
The After Shot
All monitors mounted beautifully. Notice the 1 1/4″ hole I had to drill in for the lower monitors. Some design genius at Lenovo decided putting the power cord outlet directly below the mounting plate was a good idea. This hole allows the cord to go directly in, and in the long run might be the only flaw or risk in my design since obviously removing 60% of my vertical support there weakens the integrity of the plywood. So far, though, it appears to be okay.
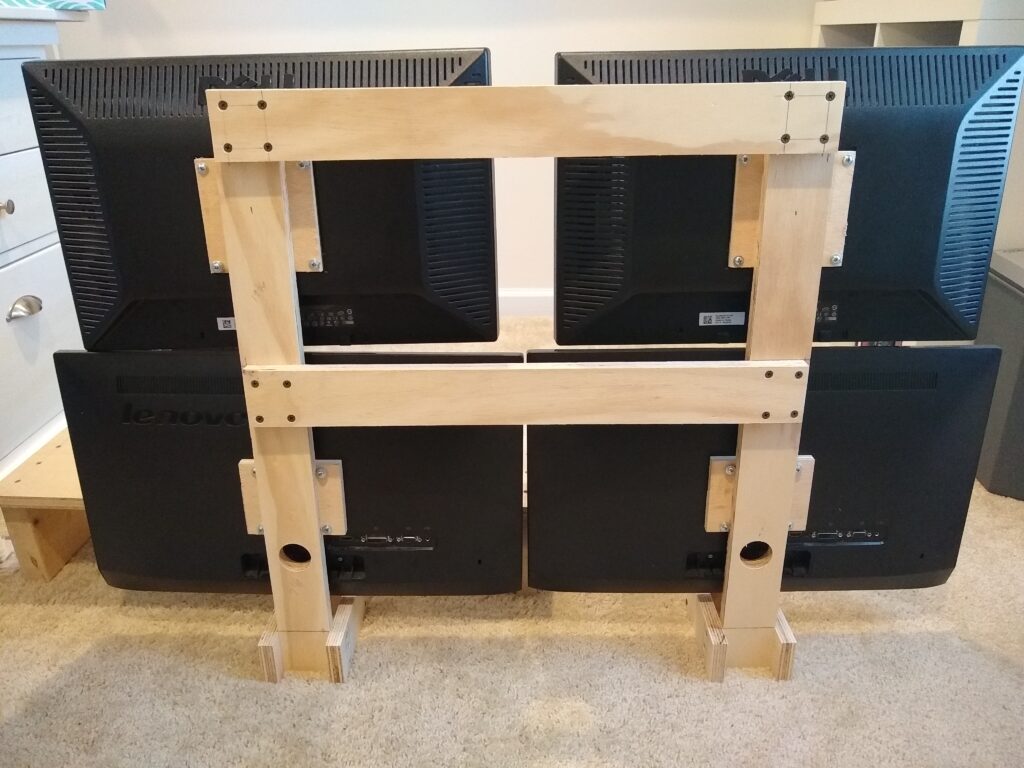
I also found that the mounting plate for the lower-left monitor appears to be slightly out of alignment (as shown by the clockwise misalignment in the gap between the top and bottom monitors.) I will need to adjust this slightly.

Here’s the final install on the desktop. I have 2 computers (desktop and laptop) so here’s the configuration I used to wire up each:
Laptop: HDMI out goes to lower left; USB-toVGA adapter goes to lower right; VGA out goes to KVM switch tied to upper right.
Desktop (has 2 DisplayPort outputs): DisplayPort-DVI #1 goes to upper left; DisplayPort-DVI #2 goes to upper right;
When I’m in work mode, I have the laptop driving 3 out of 4 monitors (shown with grey background), and only the upper-left one is displaying for the Desktop PC (with blue background.) I am using Mouse without Borders to create a seamless drag experience between all 4 monitors.
In non-work mode, I can have my Desktop PC drive the two upper monitors.
I am really satisfied with how this turned out. I spent about $5.00 on the hardware and used up several pieces of plywood scrap. Now, let’s get this WFH thing rolling!
Leave a Reply